Table of Contents
Easy Dinner Ideas: Are you tired of spending hours in the kitchen preparing dinner? Life can be hectic, and you deserve delicious meals without the fuss. In this blog post, we’ve curated a list of 10 dinner ideas that cover easy, quick, and healthy recipes for every occasion. Say goodbye to the dinner dilemma and hello to stress-free cooking. Whether you’re a busy parent, a working professional, or anyone looking for simple yet tasty dinner options, we’ve got you covered. From speedy recipes to wholesome choices, these easy dinner ideas will make your evenings a breeze. Let’s dive into the world of hassle-free cooking and discover recipes that will delight your taste buds without the stress.
Popular Dinner Recipes
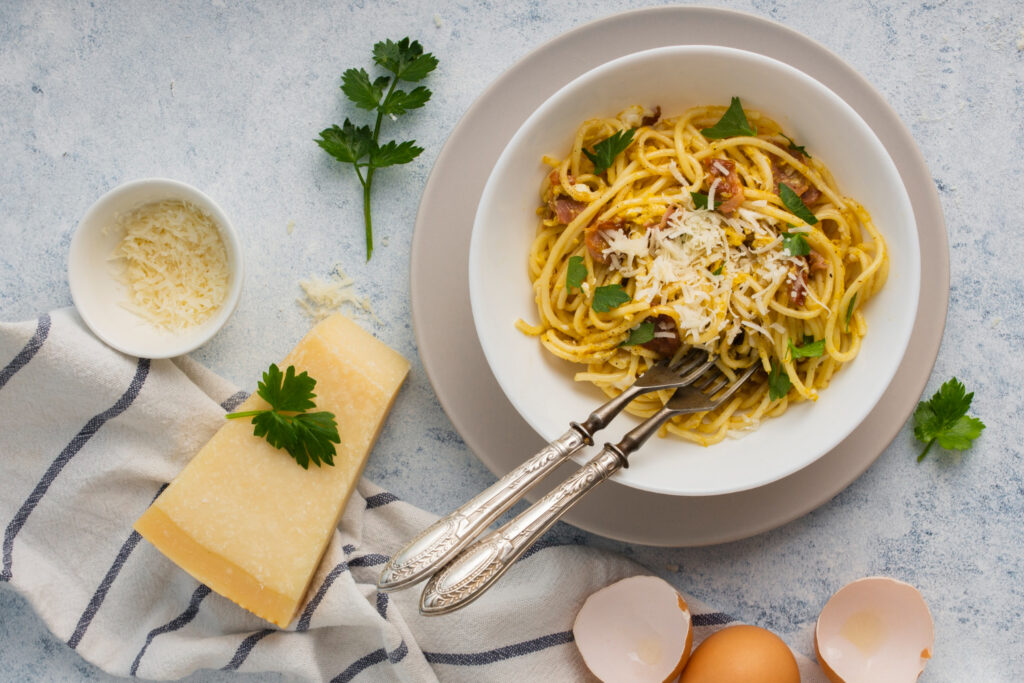
Classic Spaghetti Bolognese: Easy Dinner Ideas
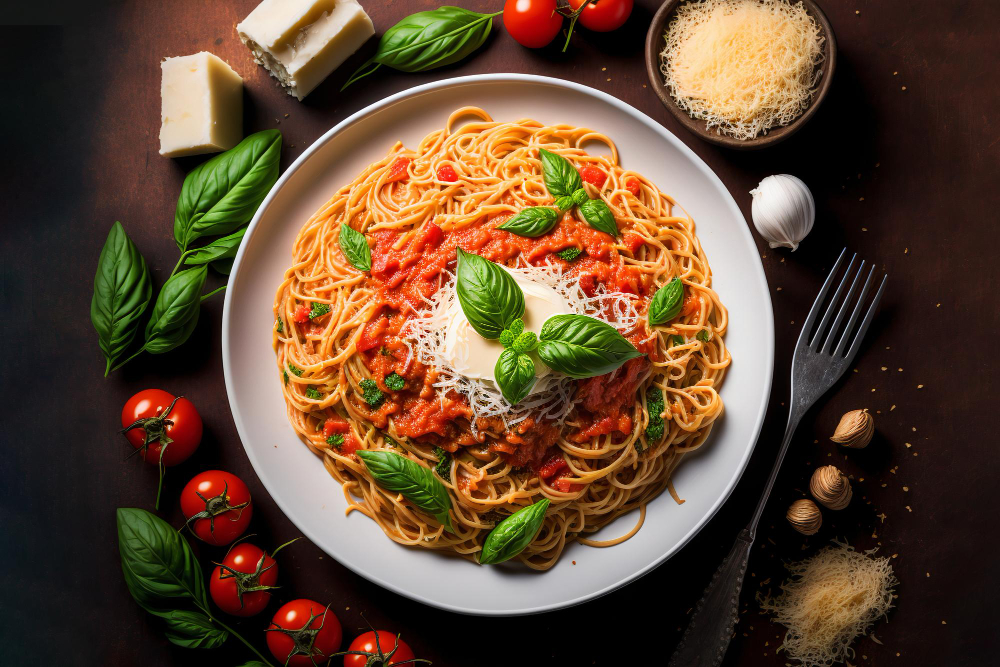
Learn to Make the Best Homemade Bolognese Sauce
Easy Dinner Ideas Classic Spaghetti Bolognese is a beloved Italian dish that has found its way into the hearts and kitchens of families worldwide. The rich, savory meat sauce served over perfectly cooked pasta is a timeless comfort food. If you’re looking to create the best homemade Bolognese sauce for a satisfying dinner, you’re in the right place. In this guide, we’ll take you through the step-by-step process to prepare a classic Spaghetti Bolognese that your family will adore
Ingredients For the Bolognese Sauce:
- 1 pound (450g) ground beef
- 1 onion, finely chopped
- 2 cloves of garlic, minced
- 1 carrot, finely chopped
- 1 celery stalk, finely chopped
- 1 can (14 oz) crushed tomatoes
- 1/2 cup red wine (optional)
- 1/2 cup whole milk
- 2 tablespoons tomato paste
- 1 teaspoon dried oregano
- 1 teaspoon dried basil
- Salt and pepper to taste
- 2 tablespoons olive oil
For the Spaghetti:
- 8 oz (225g) spaghetti
- Salt for boiling water
For Serving:
- Grated Parmesan cheese
- Fresh basil leaves
Step-by-Step Instructions
Preparing the Bolognese Sauce
- In a large, deep pan, heat the olive oil over medium heat.
- Add the chopped onion, garlic, carrot, and celery. Sauté for about 5-7 minutes until the vegetables become soft and the onion turns translucent.
- Add the ground beef and cook, breaking it apart with a spoon, until it’s browned and no longer pink.
- Stir in the tomato paste, crushed tomatoes, red wine (if using), milk, oregano, and basil.
- Season the sauce with salt and pepper, then reduce the heat to low. Cover the pan and let it simmer for at least 1 hour, stirring occasionally.
Preparing the Spaghetti
- Bring a large pot of water to a boil. Add salt and cook the spaghetti according to the package instructions until al dente.
- Drain the spaghetti and return it to the pot.
Serving Your Classic Spaghetti Bolognese
- Ladle a generous amount of Bolognese sauce over a serving of cooked spaghetti.
- Top with grated Parmesan cheese and fresh basil leaves.
Tips and Tricks
- Use a dry red wine like Chianti or Merlot to add depth of flavor to your sauce.
- If the sauce becomes too thick, you can add a little water to reach your desired consistency.
- For extra umami, consider adding a tablespoon of soy sauce to the sauce.
- Leftover Bolognese sauce can be refrigerated and enjoyed the next day; it often tastes even better after the flavors meld.
Classic Spaghetti Bolognese is a heartwarming dish that never goes out of style. Whether you’re cooking it for a family dinner or a cozy night in, it’s sure to be a crowd-pleaser. Follow these steps, and you’ll master the art of creating this classic Italian favorite in your own kitchen. Buon appetito!
Homemade Margherita Pizza: Easy Dinner Ideas
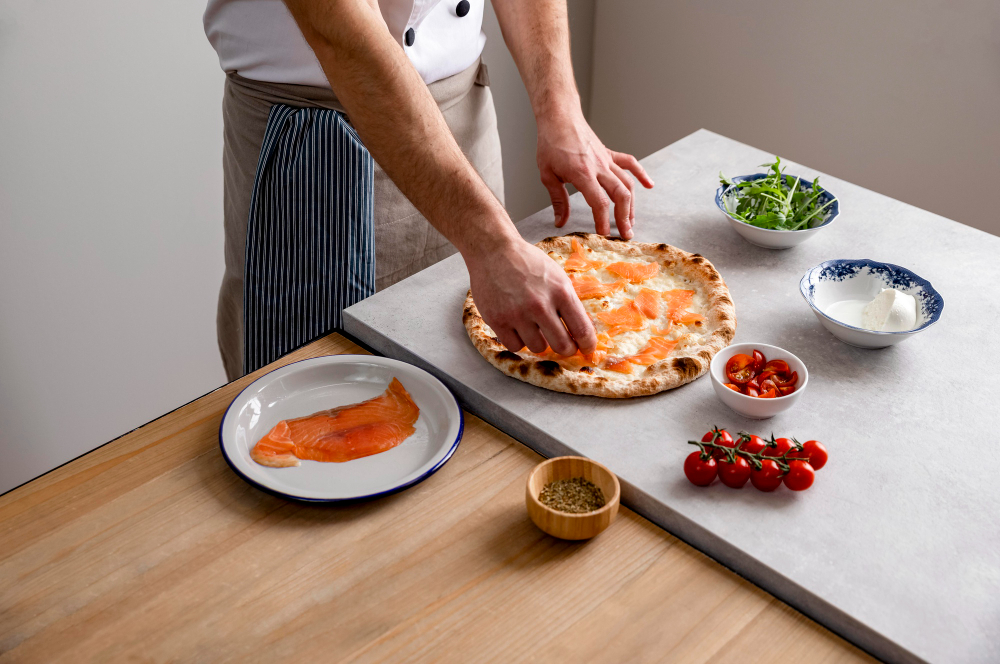
Create Your Own Margherita Pizza Masterpiece
Easy Dinner Ideas” Margherita pizza is the embodiment of Italian simplicity and flavor. With its classic combination of fresh tomatoes, mozzarella cheese, basil, and a drizzle of olive oil, this pizza captures the essence of Italian cuisine. The best part? You can recreate this delicious pizza in the comfort of your own kitchen. In this guide, we’ll show you how to make a homemade Margherita pizza that’s bursting with flavor and authenticity.
What You’ll Need For the Margherita Pizza:
- Pizza dough (store-bought or homemade)
- 1/2 cup tomato sauce (passata or crushed tomatoes)
- 8 ounces fresh mozzarella cheese, sliced
- 2-3 fresh basil leaves
- 2 tablespoons extra-virgin olive oil
- Salt and black pepper to taste
Optional Toppings:
- Red pepper flakes
- Freshly grated Parmesan cheese
Step-by-Step Instructions
Preparing the Margherita Pizza
- Preheat your oven to the highest temperature it can reach (usually around 500°F or 260°C).
- Roll out your pizza dough on a floured surface to your desired thickness.
- Transfer the rolled-out dough to a pizza stone or baking sheet.
- Spread a thin layer of tomato sauce evenly over the dough, leaving a small border for the crust.
- Arrange the fresh mozzarella slices evenly over the sauce.
- Tear the fresh basil leaves and scatter them over the pizza.
- Drizzle extra-virgin olive oil over the pizza, ensuring it’s evenly distributed.
- Season the pizza with a pinch of salt and a dash of black pepper.
Baking Your Margherita Pizza
- Carefully slide the pizza into the preheated oven.
- Bake for about 10-12 minutes or until the crust is golden and the cheese is bubbly and slightly browned.
- Keep a close eye on the pizza as baking times may vary based on your oven’s temperature.
Serving Your Margherita Pizza
- Once the pizza is out of the oven, you can add optional toppings like red pepper flakes or freshly grated Parmesan cheese for extra flavor.
- Slice your homemade Margherita pizza and serve it hot.
Tips and Tricks For this Easy Dinner Ideas
- For an authentic taste, use high-quality, fresh ingredients.
- If you prefer a thin and crispy crust, roll the dough out thinner.
- A pizza stone is ideal for achieving a crispy crust, but a baking sheet works well too.
- Experiment with additional toppings like garlic, olives, or prosciutto if you’d like to create your variation.
Now you can savor the genuine taste of Italy with your very own homemade Margherita pizza. The harmonious blend of flavors and the simplicity of this dish make it a timeless favorite. Whether you’re sharing it with family or enjoying a solo meal, your Margherita pizza is sure to be a delectable masterpiece. Buon appetito!
Grilled Chicken Caesar Salad: Easy Dinner Ideas
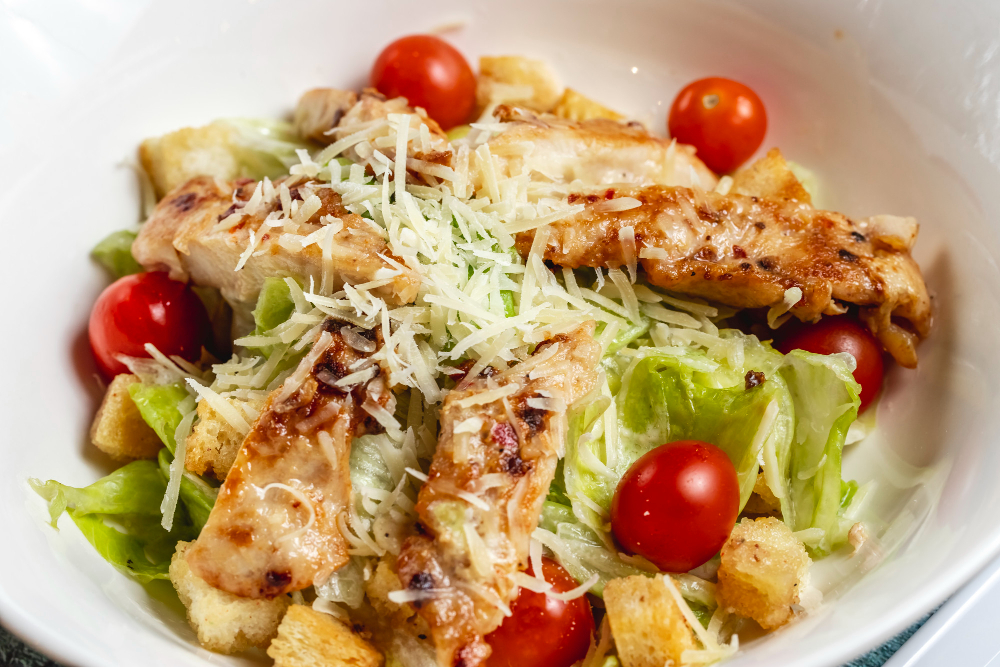
Learn How to Create the Perfect Caesar Salad with Grilled Chicken
Caesar salad is a classic choice that never goes out of style, but when you add perfectly grilled chicken to the mix, it becomes a hearty and satisfying dinner. The crispness of fresh romaine lettuce, the rich and creamy Caesar dressing, the nutty Parmesan cheese, and the grilled chicken create a symphony of flavors and textures that will delight your taste buds. In this guide, we’ll show you how to make the best Caesar dressing and grill chicken to perfection for a mouthwatering Grilled Chicken Caesar Salad.
Ingredients For the Grilled Chicken:
- 2 boneless, skinless chicken breasts
- 2 tablespoons olive oil
- 2 cloves garlic, minced
- 1 teaspoon dried oregano
- Salt and black pepper to taste
For the Caesar Dressing:
- 1/2 cup mayonnaise
- 1/4 cup grated Parmesan cheese
- 2 cloves garlic, minced
- 2 tablespoons fresh lemon juice
- 1 teaspoon Dijon mustard
- 1 teaspoon Worcestershire sauce
- Salt and black pepper to taste
For the Salad:
- 1 head of romaine lettuce, washed and chopped
- Croutons (store-bought or homemade)
- Grated Parmesan cheese
Step-by-Step Instructions
Grilling the Chicken
- In a bowl, mix the olive oil, minced garlic, dried oregano, salt, and black pepper.
- Add the chicken breasts to the bowl, ensuring they are coated with the marinade. Let them marinate for at least 15 minutes.
- Preheat your grill or grill pan to medium-high heat. Oil the grates to prevent sticking.
- Grill the chicken for about 6-8 minutes per side, or until the internal temperature reaches 165°F (75°C). Cooking times may vary depending on your grill.
Preparing the Caesar Dressing
- In a bowl, whisk together the mayonnaise, grated Parmesan cheese, minced garlic, fresh lemon juice, Dijon mustard, Worcestershire sauce, salt, and black pepper. Adjust the seasonings to your taste.
Assembling the Grilled Chicken Caesar Salad
- Once the chicken is grilled and has rested for a few minutes, slice it into thin strips.
- In a large bowl, toss the chopped romaine lettuce with the Caesar dressing until well-coated.
- Divide the dressed lettuce among serving plates.
- Arrange the sliced grilled chicken on top of the lettuce.
- Sprinkle with croutons and additional grated Parmesan cheese for extra crunch and flavor.
Tips and Tricks
- You can marinate the chicken for a few hours or overnight in the refrigerator for more intense flavor.
- For a healthier option, you can use Greek yogurt in place of mayonnaise in the dressing.
- Make your own croutons by cubing some stale bread, tossing it in olive oil and your favorite herbs, and toasting it in the oven until crispy.
Grilled Chicken Caesar Salad is a delightful and satisfying dish that’s perfect for a light dinner or a refreshing lunch. It combines the classic Caesar salad with the added protein of grilled chicken, making it a complete and delicious meal. Follow these steps to create your own restaurant-quality Grilled Chicken Caesar Salad at home. Enjoy!
Creamy Fettuccine Alfredo: An Easy Dinner Idea
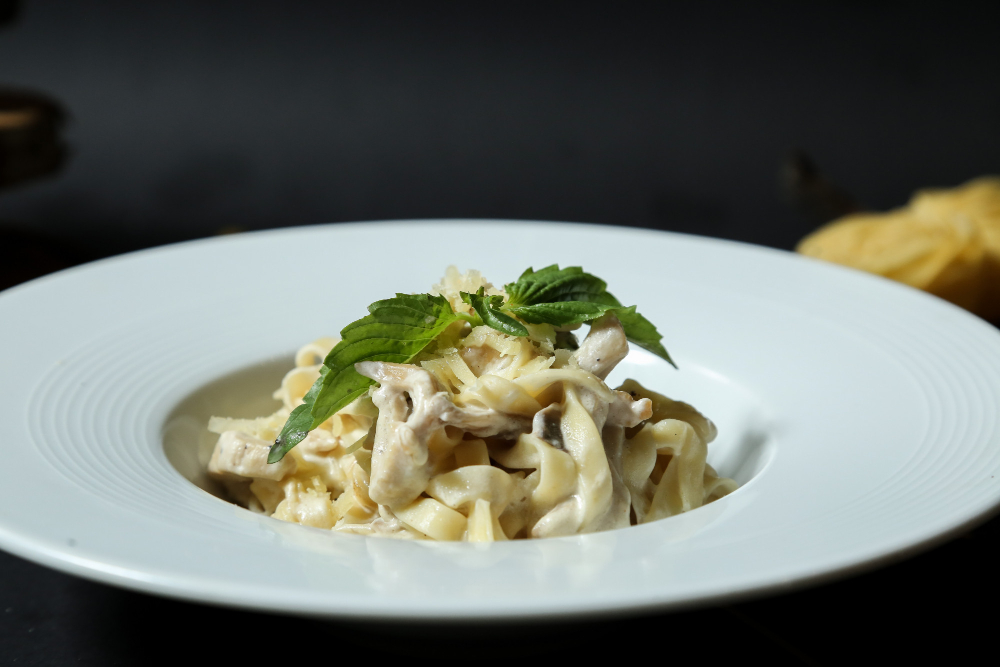
Learn How to Create the Perfect Fettuccine Alfredo
Fettuccine Alfredo is a creamy and indulgent pasta dish that never goes out of style. Its velvety, rich Alfredo sauce coats perfectly cooked fettuccine noodles to create a delectable and satisfying meal. In this guide, we’ll show you how to make a silky Alfredo sauce and serve it with fettuccine that’s cooked to perfection, ensuring your dinner is nothing short of exceptional.
Ingredients For the Fettuccine Alfredo:
- 8 oz (about 2 cups) of fettuccine pasta
- 1/2 cup unsalted butter
- 1 cup heavy cream
- 1 cup grated Parmesan cheese
- 2 cloves garlic, minced
- Salt and black pepper to taste
- Fresh parsley, chopped, for garnish
Step-by-Step Instructions
Cook the Fettuccine: In a large pot of salted boiling water, cook the fettuccine according to the package instructions until al dente. Drain the pasta and set it aside.
Prepare the Alfredo Sauce: In a large skillet or saucepan, melt the butter over medium heat. Add the minced garlic and sauté until fragrant, but do not brown it.
Add Cream and Cheese: Pour in the heavy cream and bring it to a gentle simmer. Reduce the heat to low and whisk in the grated Parmesan cheese until the sauce is smooth and the cheese is fully melted. Season with salt and black pepper to taste. Continue to simmer for about 2-3 minutes until the sauce thickens.
Combine the Pasta and Sauce: Add the cooked fettuccine to the skillet with the Alfredo sauce. Gently toss and stir to coat the pasta evenly with the sauce. Cook for an additional 2-3 minutes to heat through.
Serve: Transfer the creamy Fettuccine Alfredo to serving plates. Garnish with freshly chopped parsley for a burst of color and flavor.
Tips and Tricks
- For an extra touch of luxury, you can use freshly grated Parmigiano-Reggiano cheese.
- Experiment with different pasta shapes, but keep in mind that wider, flatter noodles like fettuccine work best to capture the rich sauce.
- If the sauce is too thick, you can thin it with a little more cream or pasta cooking water.
Creamy Fettuccine Alfredo is a comforting and timeless Italian pasta dish that’s perfect for a cozy dinner at home. This simple yet elegant recipe delivers the classic flavors you love, with its rich and creamy Alfredo sauce perfectly coating the fettuccine. Follow these steps to create your own restaurant-quality Fettuccine Alfredo and savor the Italian flavors in every bite. Buon appetito!
Beef Tacos with Homemade Salsa Easy Dinner Ideas
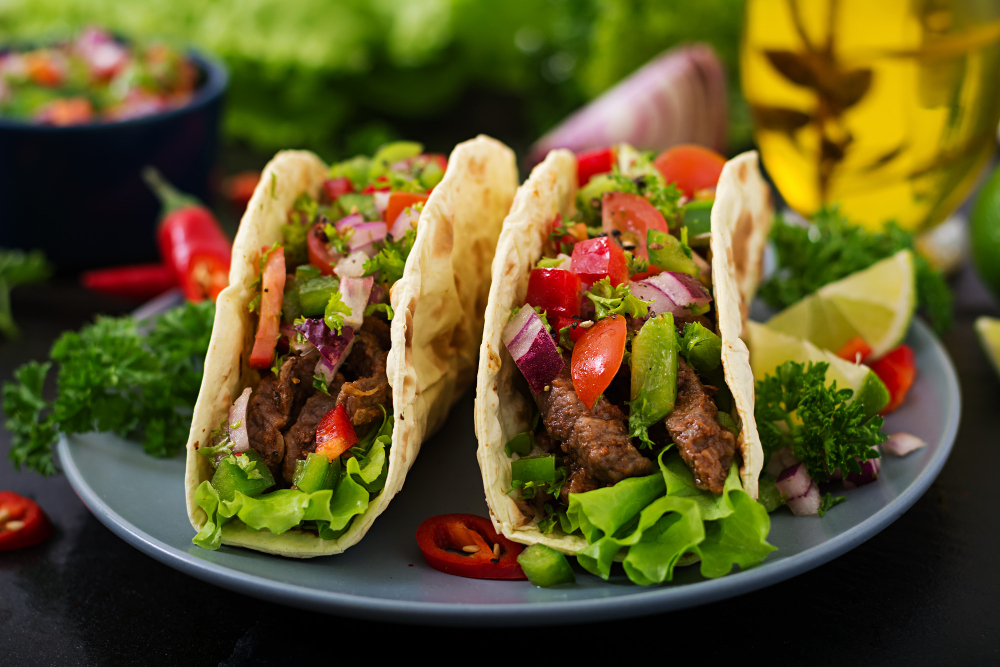
Discover How to Create Delicious Beef Tacos With Fresh Salsa
Beef tacos are a beloved and vibrant dish that brings a burst of flavors and a hint of spice to your table. When paired with homemade salsa, they become an even more irresistible treat. In this guide, we’ll take you through the process of crafting these flavor-packed beef tacos and show you how to prepare the salsa from scratch, ensuring a fiesta of taste in every bite.
Ingredients For the Beef Tacos:
- 1 lb ground beef
- 1 small onion, finely chopped
- 1-2 cloves garlic, minced
- 1 packet taco seasoning
- 1/2 cup water
- 8 small taco shells
- Shredded lettuce, for topping
- Shredded cheddar cheese, for topping
- Sour cream, for topping
For the Homemade Salsa:
- 4 ripe tomatoes, diced
- 1/2 onion, finely chopped
- 1/4 cup fresh cilantro, chopped
- 1-2 cloves garlic, minced
- 1-2 jalapeño peppers, finely chopped (adjust for spice level)
- 2 tablespoons lime juice
- Salt and black pepper to taste
Step-by-Step Instructions
Preparing the Homemade Salsa
Combine Ingredients: In a mixing bowl, combine the diced tomatoes, finely chopped onions, minced garlic, chopped cilantro, and finely chopped jalapeño peppers.
Season and Mix: Add the lime juice and sprinkle with salt and black pepper to taste. Gently mix all the ingredients until they are well combined. Adjust the salt, pepper, and lime juice according to your taste preferences.
Refrigerate: Cover the bowl with plastic wrap and refrigerate the salsa for at least 30 minutes to allow the flavors to meld together. You can also prepare the salsa a few hours in advance for even more flavor.
Making the Beef Tacos
Cook the Beef: In a skillet over medium heat, cook the ground beef until it’s browned and crumbled. Drain any excess fat from the skillet.
Add Aromatics: Return the skillet to the heat and add the finely chopped onion and minced garlic. Sauté until the onion becomes translucent.
Season the Beef: Stir in the taco seasoning and water, then simmer until the mixture thickens and the beef is coated with the seasoning.
Warm Taco Shells: Heat the taco shells according to the package instructions.
Assemble Tacos: Fill each taco shell with the seasoned beef mixture. Top with shredded lettuce, cheddar cheese, a dollop of sour cream, and a generous spoonful of homemade salsa.
Serve: Arrange the beef tacos on a platter and serve immediately. Don’t forget to have extra salsa on hand for those who can’t get enough of its zesty kick.
Tips and Tricks
- For a vegetarian version, replace the ground beef with sautéed mushrooms or black beans.
- Customize your toppings with diced avocado, sliced black olives, or a drizzle of hot sauce.
- To make your salsa milder, remove the seeds and membranes from the jalapeño peppers before chopping.
- Double or triple the salsa recipe to have some on hand for snacking or to use as a condiment for other dishes.
Beef Tacos with Homemade Salsa are a delightful and flavorful way to enjoy a Mexican-inspired meal at home. The seasoned ground beef, paired with the freshness of homemade salsa, creates a mouthwatering combination that’s hard to resist. Follow these simple steps to create your own beef tacos and salsa, and treat your taste buds to a delicious fiesta!
Quick Dinner Ideas
Lemon Butter Shrimp

Indulge in the Irresistible Flavor of Lemon Butter Shrimp
If you’re seeking a quick and delightful seafood dinner, look no further. Lemon butter shrimp is a dish that bursts with zesty, buttery goodness and succulent shrimp. The citrusy notes of lemon perfectly complement the richness of the butter, creating a harmonious taste that will tantalize your taste buds. In this guide, we’ll walk you through the steps to prepare this mouthwatering dish in just 20 minutes.
What You’ll Need For the Lemon Butter Shrimp:
- 1 pound large shrimp, peeled and deveined
- 2 tablespoons unsalted butter
- 2 cloves garlic, minced
- Zest of 1 lemon
- Juice of 1 lemon
- 2 tablespoons fresh parsley, chopped
- Salt and black pepper to taste
Additional Ingredients:
- Cooked pasta, rice, or crusty bread (for serving)
- Lemon wedges and fresh parsley (for garnish)
Step-by-Step Instructions
Cooking the Lemon Butter Shrimp
- Heat a large skillet over medium-high heat and add the butter.
- Once the butter has melted and is sizzling, add the minced garlic and cook for about 1 minute until fragrant.
- Add the peeled and deveined shrimp to the skillet, spreading them evenly in a single layer.
- Season the shrimp with salt and black pepper.
- Cook the shrimp for approximately 2-3 minutes on each side until they turn pink and opaque.
- Stir in the lemon zest, lemon juice, and fresh parsley.
- Cook for an additional minute to let the flavors meld.
Serving Your Lemon Butter Shrimp
- Spoon the lemon butter shrimp over cooked pasta, rice, or enjoy it with a slice of crusty bread.
- Garnish with lemon wedges and fresh parsley.
- Serve immediately while the shrimp is hot and the sauce is at its freshest.
Tips and Tricks
- For a more intense lemon flavor, add a bit more lemon zest or juice to suit your taste.
- Don’t overcook the shrimp; they cook quickly and become rubbery if left on the heat too long.
- You can tailor the level of garlic to your preference, but the combination of garlic and lemon is key to this dish’s flavor.
Now that you have the recipe for lemon butter shrimp, you can easily prepare a gourmet-style seafood dinner in just 20 minutes. Whether you serve it over pasta, rice, or with crusty bread, this dish is sure to be a hit. The enticing aroma and refreshing zest of lemon make it a perfect choice for a delightful, quick dinner. Enjoy your restaurant-quality lemon butter shrimp at home!
One-Pot Chicken and Rice: Easy Dinner Ideas
Learn How to Make a One-Pot Chicken and Rice Dish in 30 Minutes
One-pot meals are a lifesaver when you need a quick and satisfying dinner without the fuss. This recipe for one-pot chicken and rice combines tender chicken, flavorful rice, and a medley of spices for a delightful dish that’s ready in just 30 minutes. If you’re in search of a fuss-free meal with great taste, you’re in for a treat!
Ingredients For One-Pot Chicken and Rice:
- 4 boneless, skinless chicken thighs
- 1 cup long-grain white rice
- 2 cups chicken broth
- 1 onion, finely chopped
- 2 cloves garlic, minced
- 1 bell pepper, diced
- 1 teaspoon paprika
- 1 teaspoon dried thyme
- 1 teaspoon dried oregano
- Salt and black pepper to taste
- Chopped fresh parsley for garnish
Step-by-Step Instructions
Sear the Chicken: Heat a large, deep skillet or pan over medium-high heat. Season the chicken thighs with salt, black pepper, and paprika. Sear the chicken in the hot pan until it’s golden brown on both sides. Remove the chicken from the pan and set it aside.
Sauté Aromatics: In the same pan, add the chopped onion and bell pepper. Sauté until the onion is translucent and the bell pepper is tender. Stir in the minced garlic, dried thyme, and dried oregano. Cook for another minute until fragrant.
Add Rice and Broth: Stir in the white rice, coating it with the aromatic mixture. Pour in the chicken broth and season with additional salt and black pepper to taste. Bring the mixture to a gentle boil.
Return Chicken: Place the seared chicken thighs back into the pan, nestling them into the rice mixture.
Simmer: Reduce the heat to low, cover the pan, and let it simmer for about 20 minutes or until the chicken is fully cooked, and the rice has absorbed the liquid. Make sure the internal temperature of the chicken reaches 165°F (74°C).
Serve: Once the chicken is cooked and the rice is tender, garnish the dish with chopped fresh parsley. Serve hot, and enjoy your one-pot chicken and rice!
Tips and Tricks
- Customize the dish by adding your favorite vegetables, such as peas, carrots, or corn.
- For extra flavor, you can include a squeeze of fresh lemon juice or grated Parmesan cheese when serving.
One-pot chicken and rice is not only a time-saver, but it’s also packed with flavor. The combination of seared chicken, aromatic spices, and tender rice creates a satisfying meal that’s perfect for a busy weeknight. With minimal prep and cleanup, this dish will become a go-to recipe in your kitchen. Enjoy a delicious dinner with the ease of making it all in one pot!
Garlic Shrimp Pasta
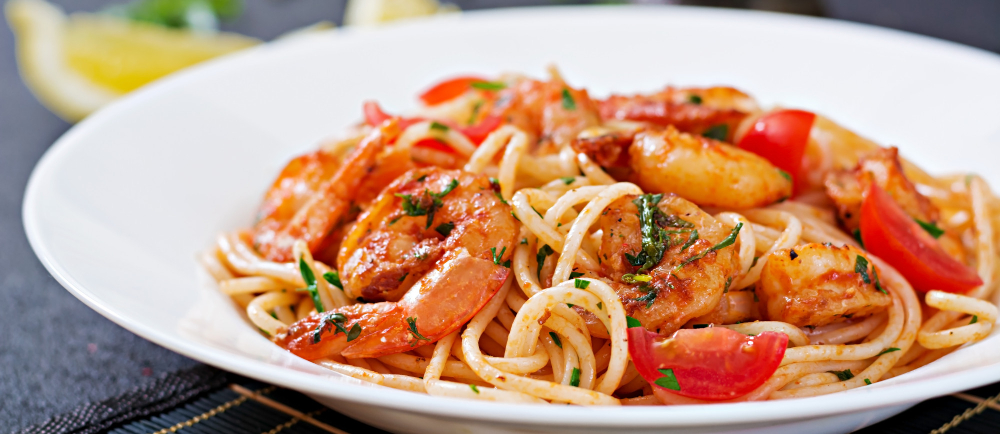
Learn How to Prepare Garlic Shrimp Pasta in Just 15 Minutes
Craving a delectable seafood dinner without spending hours in the kitchen? This recipe for garlic shrimp pasta is here to save the day. With succulent shrimp, flavorful garlic, and perfectly cooked pasta, you can have a restaurant-quality dish in the comfort of your own home in just 15 minutes.
Ingredients For Garlic Shrimp Pasta:
- 8 ounces linguine or your pasta of choice
- 1/2 pound large shrimp, peeled and deveined
- 4 cloves garlic, minced
- 1/4 cup unsalted butter
- 1/4 cup chicken or vegetable broth
- Juice of one lemon
- Salt and black pepper to taste
- Chopped fresh parsley for garnish
- Grated Parmesan cheese (optional)
Step-by-Step Instructions
Cook the Pasta: Begin by cooking the linguine or your pasta of choice according to the package instructions. Drain and set it aside.
Sauté the Shrimp: In a large skillet, melt the unsalted butter over medium-high heat. Add the minced garlic and sauté for about 1-2 minutes until fragrant.
Cook the Shrimp: Add the peeled and deveined shrimp to the skillet. Season with salt and black pepper to taste. Cook the shrimp until they turn pink and opaque, typically about 2-3 minutes per side.
Deglaze the Pan: Pour in the chicken or vegetable broth and lemon juice. Allow the mixture to simmer for another 2-3 minutes, allowing the flavors to meld together.
Combine Pasta and Shrimp: Add the cooked pasta to the skillet with the garlic shrimp. Toss everything together to coat the pasta with the flavorful garlic butter sauce.
Serve: Garnish the dish with freshly chopped parsley and, if desired, a sprinkle of grated Parmesan cheese. Your garlic shrimp pasta is ready to be served.
Tips and Tricks
- Customize the dish with your preferred pasta shape, from linguine to fettuccine or even spaghetti.
- For extra heat, add a pinch of red pepper flakes when sautéing the garlic.
Garlic shrimp pasta is a go-to recipe for those times when you want a quick and delightful meal. The combination of succulent shrimp, aromatic garlic, and zesty lemon creates a flavor explosion in every bite. Whether it’s a busy weeknight or a special occasion, this dish is sure to impress your taste buds without the hassle of a long cooking process. Enjoy your restaurant-quality garlic shrimp pasta at home!
Healthy Dinner Recipes
Quinoa and Veggie Stuffed Peppers
Discover a Healthy Dinner Recipe That’s Both Nutritious and Delicious
Looking for a nutritious and satisfying dinner option? Quinoa and veggie stuffed peppers are the answer. Packed with wholesome ingredients and bursting with flavors, this recipe is a fantastic way to incorporate more vegetables into your diet while savoring a delicious meal.
Ingredients For Quinoa and Veggie Stuffed Peppers:
- 4 large bell peppers, any color
- 1 cup quinoa, rinsed and drained
- 2 cups vegetable broth
- 1 cup black beans, cooked and drained
- 1 cup corn kernels (fresh, frozen, or canned)
- 1 cup diced tomatoes
- 1/2 cup red onion, finely chopped
- 1/2 cup bell pepper, finely chopped
- 2 cloves garlic, minced
- 1 tsp cumin
- 1 tsp chili powder
- Salt and black pepper to taste
- 1 cup shredded cheddar or Monterey Jack cheese (optional)
- Fresh cilantro or parsley for garnish
Step-by-Step Instructions
Prepare the Bell Peppers: Preheat your oven to 375°F (190°C). Cut the tops off the bell peppers, remove the seeds and membranes, and lightly season the insides with salt. Place them in a baking dish and set aside.
Cook the Quinoa: In a saucepan, combine the rinsed quinoa and vegetable broth. Bring to a boil, then reduce the heat to low, cover, and simmer for about 15 minutes or until the quinoa is cooked and the liquid is absorbed.
Prepare the Filling: In a large bowl, combine the cooked quinoa, black beans, corn, diced tomatoes, red onion, bell pepper, minced garlic, cumin, chili powder, salt, and black pepper. Mix everything together until well combined.
Stuff the Peppers: Spoon the quinoa and veggie mixture into the prepared bell peppers, pressing down gently to pack the filling.
Bake: Cover the baking dish with foil and bake in the preheated oven for about 25-30 minutes or until the peppers are tender.
Add Cheese (Optional): If desired, remove the foil, sprinkle the stuffed peppers with shredded cheese, and return them to the oven. Bake for an additional 5-10 minutes or until the cheese is melted and bubbly.
Garnish and Serve: Remove the stuffed peppers from the oven, garnish with fresh cilantro or parsley, and serve them hot.
Tips and Tricks
- Feel free to customize the filling by adding your favorite veggies or spices.
- For a vegan version, skip the cheese or use a dairy-free alternative.
Quinoa and veggie stuffed peppers are not only a visually appealing dish but also a nutrient-packed and flavorful meal. Whether you’re a vegetarian or simply looking for a wholesome dinner option, these stuffed peppers are sure to satisfy your taste buds while providing essential nutrients. Enjoy this delightful and healthy dinner option with your loved ones!
Baked Salmon with Asparagus
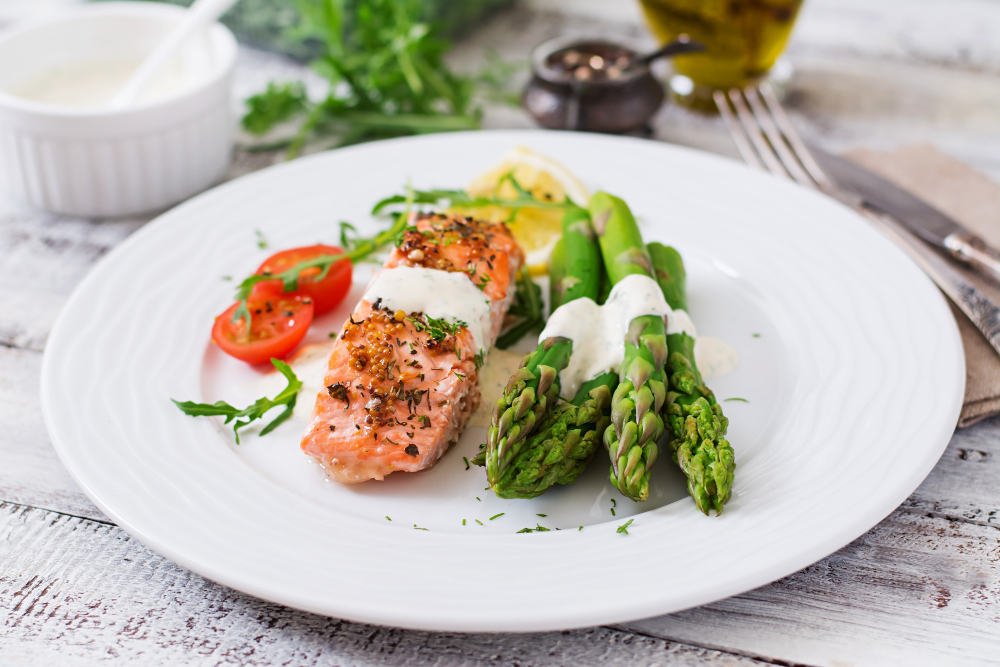
Discover a Simple and Nutrient-Packed Salmon Recipe
Looking for a healthy and delicious dinner option? Baked salmon with asparagus is a fantastic choice. This recipe not only offers a delightful culinary experience but also packs a nutritious punch. You can have a restaurant-quality meal at home, guilt-free.
Ingredients For Baked Salmon with Asparagus:
- 2 salmon fillets
- 1 bunch of fresh asparagus
- 2 tablespoons olive oil
- 2 cloves garlic, minced
- 1 lemon, sliced
- 1 teaspoon dried oregano
- Salt and black pepper to taste
- Fresh dill for garnish
Step-by-Step Instructions
Preheat the Oven: Begin by preheating your oven to 375°F (190°C).
Prepare the Salmon: Place the salmon fillets on a baking sheet lined with parchment paper. Season them with salt, black pepper, and dried oregano. Lay a few lemon slices on top of each fillet.
Prepare the Asparagus: Trim the woody ends of the asparagus and place them on the baking sheet alongside the salmon.
Drizzle with Olive Oil: Drizzle olive oil over the salmon and asparagus. Make sure the asparagus is evenly coated with the oil.
Add Minced Garlic: Sprinkle the minced garlic over the salmon and asparagus.
Season: Season the dish with an extra pinch of salt and black pepper to taste.
Bake: Bake in the preheated oven for about 15-20 minutes or until the salmon flakes easily with a fork and the asparagus is tender.
Garnish and Serve: Remove the baked salmon and asparagus from the oven. Garnish with fresh dill and serve hot.
Tips and Tricks
- You can add a drizzle of lemon juice for extra zest just before serving.
- Feel free to customize the seasoning with your favorite herbs and spices.
Baked salmon with asparagus is a nutritious and delightful dinner option. It’s not only quick and easy to prepare but also full of omega-3 fatty acids and vibrant flavors. Whether you’re looking for a simple weeknight dinner or a healthy special occasion meal, this recipe has you covered. Enjoy the goodness of salmon and asparagus right at your dinner table.
Common Questions and Answers About Easy Dinner Ideas
Q1: What are some quick and easy dinner ideas for busy weeknights?
A1: When you’re short on time, go for recipes like one-pot pasta dishes, stir-fries, or sheet pan meals. These options are not only quick to prepare but also delicious.
Q2: Can you suggest easy dinner ideas that are kid-friendly?
A2: Kids often love classics like spaghetti with meatballs, mac and cheese, and homemade pizza. These recipes are not only easy to make but also sure to please the little ones.
Q3: Are there healthy easy dinner ideas for those watching their calories?
A3: Absolutely! Consider dishes like grilled chicken with a side of roasted vegetables, quinoa salad with fresh veggies, or baked fish with a squeeze of lemon. These recipes are both healthy and easy to prepare.
Q4: How can I make easy dinners with ingredients I already have at home?
A4: Look for recipes that use pantry staples like canned beans, pasta, or rice. Dishes like bean chili, pasta aglio e olio, or a rice and vegetable stir-fry are great choices.
Q5: What are some vegetarian easy dinner ideas?
A5: Vegetarian dinners can be both easy and delicious. Try recipes like vegetable stir-fry, spinach and feta stuffed mushrooms, or a hearty vegetable curry.
Enjoy effortless and tasty dinners with these easy dinner ideas. Whether you’re a busy parent, a student, or simply someone looking for convenient meals, these recipes have got you covered.
Explore more culinary inspiration with our related blog articles: